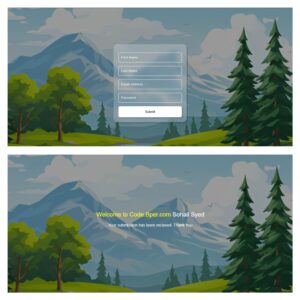
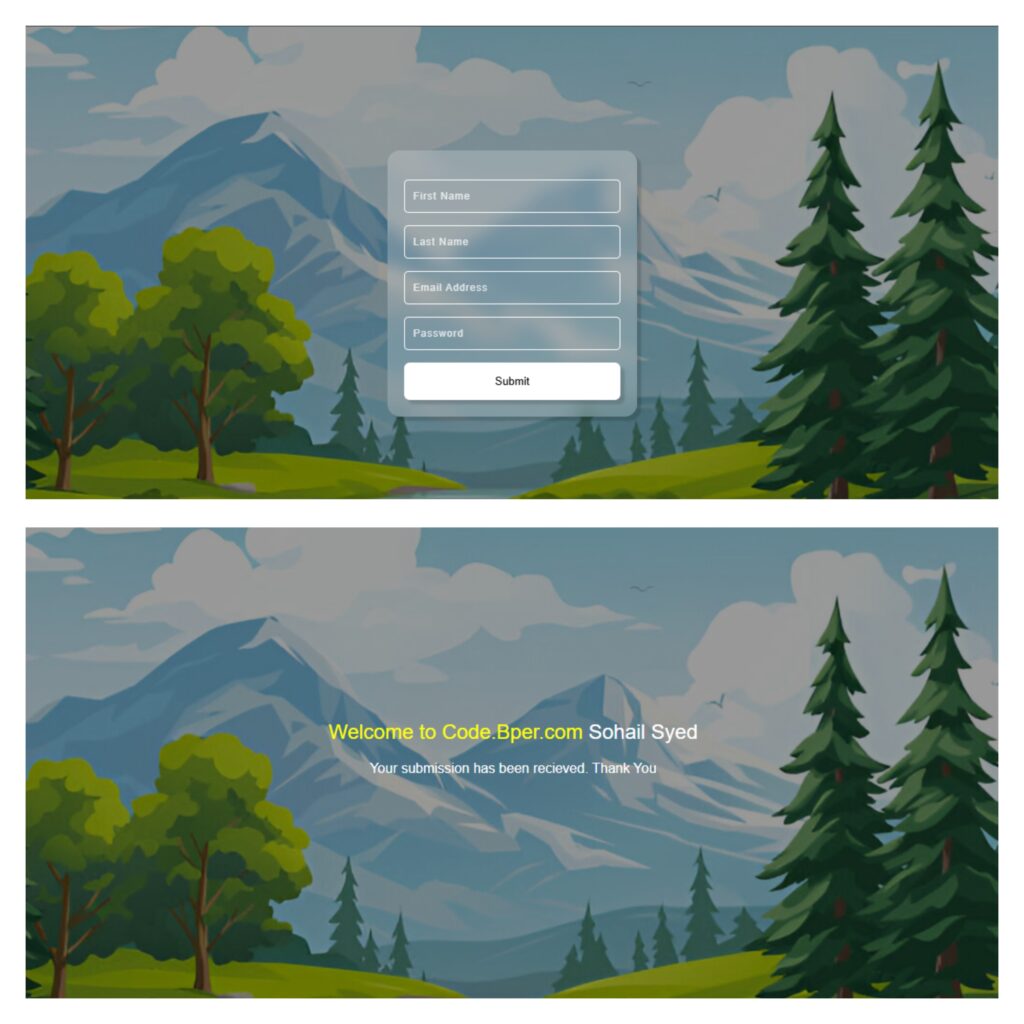
Code Preview:
Welcome to Code.Bpers.com
Your submission has been received. Thank You
Folder Structure:
- First we will create a main folder for our project
- Then inside it we will create 3 files two of these be html files and one css
- A index.html file that contains registration page and a thank-you file thats for greetings.
Introduction:
This project is a responsive registration form using Html, CSS, and javaScript. It collects user details and stores the first and last name in Local Storage before redirecting to a thank-you page with a personalized greeting.
The design features a glassmorphism effect, a background image with an overlay, and smooth UI interactions. JavaScript handles form validation, ensuring users fill in all fields. This project demonstrates modern UI styling and client-side data handling in web development.
Index File Code:
<!DOCTYPE html>
<html lang="en">

<head>
    <meta charset="UTF-8">
    <meta name="viewport" content="width=device-width, initial-scale=1.0">
    <title>Registration Form | Html CSS JavaScript By Code.bpers.com</title>
    <link rel="stylesheet" href="style.css">
</head>

<body>
    <div class="container">
        <div class="wrapper">
            <div class="input_box">
                <input type="text" id="fName" placeholder="First Name">
            </div>
            <div class="input_box">
                <input type="text" id="lName" placeholder="Last Name">
            </div>
            <div class="input_box">
                <input type="email" id="emailF" placeholder="Email Address">
            </div>
            <div class="input_box">
                <input type="password" id="passF" placeholder="Password">
            </div>
            <button id="submit">Submit</button>
        </div>
    </div>

    <script>
        document.getElementById('submit').addEventListener('click', () => {
            const FiName = document.getElementById('fName').value.trim();
            const laName = document.getElementById('lName').value.trim();
            const email = document.getElementById('emailF').value.trim();
            const paField = document.getElementById('passF').value.trim();

            if(FiName === '' || laName === '' || email === '' || paField === '') {
                alert('Please enter below all fields');
            } else {
                localStorage.setItem('firstName', FiName);
                localStorage.setItem('lastName', laName);

                window.location = 'thanks.html';
            }
        });
    </script>
</body>

</html>

...
Explanation:
Inside the <body>, there is a div with the class container, which acts as the main wrapper for the form. Inside this, another div with the class wrapper contains all input fields and the submit button.
Each input field is wrapped inside a div with the class input_box. There are four input fields: First Name, Last Name, Email, and Password, each having a unique id for easy JavaScript access.
The button with id="submit" triggers the form submission process when clicked.
In the <script> section, JavaScript is used to add functionality to the form.
First, it selects the submit button using document.getElementById('submit') and adds an event listener for the click event. When clicked, it retrieves user input values using document.getElementById().value.trim(), ensuring that extra spaces are removed.
Then, a validation check is performed to ensure that First Name and Last Name are not empty. If either is empty, an alert message "Please enter below all fields" is shown.
If both names are provided, their values are stored in the Local Storage using localStorage.setItem(), so they can be accessed later on another page.
Finally, the script redirects the user to "thanks.html" using window.location = 'thanks.html';, which takes them to a thank-you page.
CSS Code:
* {
    padding: 0;
    margin: 0;
    box-sizing: border-box;
    font-family: Arial, Helvetica, sans-serif;
}

html,
body {
    display: grid;
    height: 100%;
    place-items: center;
}

body {
    width: 100%;
}

.container {
    position: relative;
    width: 100%;
    height: 100vh;
    background: url('images/image.png') center center;
    background-size: cover;
    display: flex;
    justify-content: center;
    align-items: center;
}

.container::after {
    content: '';
    position: absolute;
    width: 100%;
    height: 100%;
    background: rgb(0, 0, 0, 0.4);
}

.wrapper {
    width: 300px;
    padding: 20px;
    box-shadow: 5px 5px 2px rgba(0, 0, 0, 0.15);
    z-index: 99;
    background: #ffffff35;
    backdrop-filter: blur(10px);
    border-radius: 15px;
}

.input_box {
    margin: 15px 0px;
}

input {
    width: 100%;
    padding: 12px 10px;
    border: 0;
    outline: none;
    background: transparent;
    color: #ffffffc9;
    font-size: 12px;
    letter-spacing: 1px;
    border: 1px solid #fff;
    border-radius: 5px;
}

input::placeholder {
    color: #ffffffc9;
    font-size: 12px;
    letter-spacing: 1px;
}

button {
    border: 0;
    outline: none;
    width: 100%;
    padding: 15px;
    box-shadow: 5px 5px 3px rgba(0, 0, 0, 0.15);
    border-radius: 7px;
    color: #000;
    background: #fff;
    transition: background 0.3s;
    cursor: pointer;
}

button:hover {
    background: #ffffffe5;
}

.card {
    z-index: 99;
    color: #fff;
    text-align: center;
    margin-top: -100px;
}

#greetings {
    margin-bottom: 20px;
    font-weight: 300;
}

b {
    font-weight: 500;
    color: yellow;
}
Explanation:
The CSS code is responsible for styling the registration form, making it visually appealing and user-friendly.
First, it applies a universal reset using *, setting padding and margin to 0 and using box-sizing: border-box.
The html, body are set to use display: grid with place-items: center, ensuring the form stays centered on the screen. The body takes full width, maintaining responsiveness.
The .container div covers the entire viewport (100vw and 100vh) and sets a background image (background: url('images/image.png') center center;), which is positioned centrally and covers the whole screen.
An ::after pseudo-element is used to add a dark overlay, improving text visibility by setting a background: rgb(0, 0, 0, 0.4).
The .wrapper div, which holds the form, has a glassmorphism effect, making it look modern. It has a width of 300px, padding, and a box-shadow for a soft elevation effect.
The background is semi-transparent (#ffffff35) with backdrop-filter: blur(10px), creating a frosted glass look. It also has border-radius: 15px for smooth edges.
Each .input_box has a margin for spacing. The input fields are styled with width: 100%, padding, a transparent background, and a white border (1px solid #fff).
The ::placeholder text is slightly transparent (color: #ffffffc9) to blend smoothly. The button has a white background with a subtle shadow effect, making it stand out. On hover, the background becomes slightly transparent (#ffffffe5) for an interactive feel.
The .card inside the thank-you page is centered using text-align: center with color: #fff.
The #greetings heading has margin-bottom: 20px for spacing, and the <b> tag inside it is highlighted in yellow, ensuring the user’s name stands out.
The combination of these styles creates a clean, modern, and visually appealing registration form with a stylish Glassmorphism effect.
Thanks File Code:
<!DOCTYPE html>
<html lang="en">
<head>
    <meta charset="UTF-8">
    <meta name="viewport" content="width=device-width, initial-scale=1.0">
    <title>Document</title>
    <link rel="stylesheet" href="style.css">
</head>
<body>
    <div class="container">
        <div class="card">
            <h2 id="greetings">Welcome to Code.Bpers.com</h2>
            <p>Your submission has been recieved. Thank You</p>
        </div>
    </div>

    <script>
        const firstName = localStorage.getItem('firstName');
        const lastName = localStorage.getItem('lastName');

        if (firstName && lastName) {
            document.getElementById('greetings').innerHTML = `<b> Welcome to COde Bpers! </b> ${firstName} ${lastName}`;
        }
    </script>
</body>
</html>
Explanation:
The second HTML file is a thank-you page that displays a personalized greeting after the user submits the registration form.
Inside the <body>, a div with the class container wraps the content, and a .card div contains a <h2> element with id="greetings", initially set to "Welcome to Code.Bpers.com!", along with a static thank-you message.
In the <script> section, JavaScript retrieves the user’s first and last name from Local Storage using localStorage.getItem().
If values exist, the script updates the greetings text dynamically using template literals, displaying "Welcome to Code.Boers.com! [User Name]". This adds a personalized touch to the page.
Since this page only reads data and doesn’t store anything, it is lightweight and efficient. The design remains consistent with the registration form, using a glass morphism effect and background overlay, ensuring a smooth transition between both pages.